; Stitches | Quilting Stories Quilting Tutorials and Discussions
Showing posts with label Stitches. Show all posts

Monday, February 03, 2020

Four Patch Baby Quilt

Four Patch Quilt

Four Patch Quilt

Four Patch Quilt

Four Patch Quilt

Among my unfinished tops I picked what I called the Gypsy Four Patch top. I found it too messy to become a double size bed cover, definitely I did not like it. Sometimes I wonder why I insist when in doubt...  I remember that from the very beginning I was not sure of myself and instead of stopping I went on adding other fabric lines, as a consequence that the more I was advancing with this project, trying to improve it, the less I was satisfied. Final result : an abandoned top.

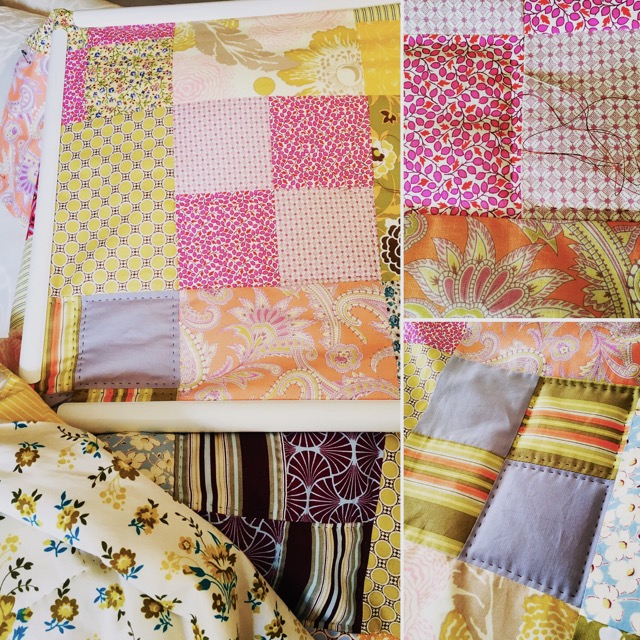
Wondering what to do with this top, it came to my mind that it could be nice as a baby quilt. So I cut it in four parts and started to quilt the first one. On a small scale it looks better and quite joyful though soft colors. Maybe the fabric design is not very kid's style? What is you opinion? Well, we shall see and if I am pleased with this first one I will go on with the three others...

Saturday, August 08, 2015

Hexagon Tutorial Paper Piecing

Hexagons

Cut Hexagon papers at the size of your choice.
You can find them easily downloadable on the net.
Or you can buy them ready in quilting shops.

Hexagons

Hexagons

Put one hexagon paper on a plastic or cardboard and cut it 1/2" larger.

Hexagons

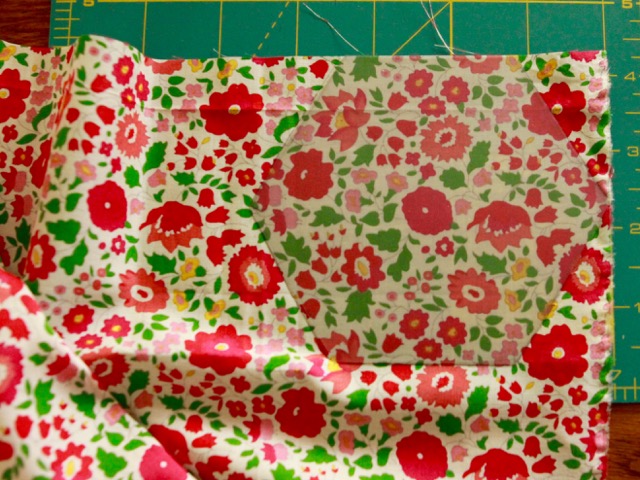
If you use transparent plastic, you can center a subject on your fabric.

Hexagons

Put your plastic template on your fabric on any side, it does not matter.

Hexagons

Draw a thin line all around.

Hexagons

Cut on the line.

Hexagons

Take one of your paper templates and place it on the WRONG side of your fabric hexagon.

Hexagons

Fold one side and attach it with a paper clip.

Hexagons

Sew with big stitches all around.

Hexagon

Your hexagon is ready.

Thursday, April 23, 2015

Basting Tutorial


The first thing when you prepare basting is to cut the backing and the batting at least 4 inches larger and 4 inches longer than the top.

Basting

Draw a mark on the middle of your table.
Fold your backing in two lengthwise, wrong side against wrong side.
Line it up with the mark.

Basting

Open and fix it with a tape.

Basting

Do the same with your batting. Then fold your top in two lengthwise, right side against right side and line it up.

Basting

This is what you obtain.

Basting

These are the tools you need for basting your three layers.

Basting

Before stitching, put some pins to maintain the three layers together.

Basting

The spoon will help you to lift and grasp your needle effortless without moving the quilt.

Basting

Start from the middle of the quilt and stitch diagonal lines with big stitches.

Basting

The quilt is now ready to be fixed on the hoop for hand quilting.

Sunday, March 08, 2015

On The Hoop Again

Windmill baby quilt

Quilting tools

Hand stitches

 Hand stitches

Slow Sunday Stitching with Kathy at Kathy's Quilts.

After a long time without hand quilting, I decided to hand quilt the Windmill baby quilt for my grandson. The last time I did so was for the Four Patch Quilt few years ago.
Today I will try quilting with large stitches, which is not so easy for me because when I started quilting I learnt that the most tiny stitches the most beautiful and valuable! Large stitches give a different style, maybe more actual, but the difficulty is to make even stitches.

Wishing a happy relaxing stitching Sunday to all my friends!

Sunday, November 02, 2014

Mini Houses

Slow Sunday Stitching 

Miniature quilt
Four mini houses

Detail mini houses
Detail mini house

Quilt back
Hand stitches

Quilt back
Hand stitches
Together with the basket pattern, the house pattern is my favorite one. Although I made several basket quilts, I only did this miniature house quilt, but it is in my projects to create a large one some day...
Sunday morning is ideal for slow stitching and I finished the binding of this miniature quilt (here in Greece it is 2 pm). The size is 13.50" x 13,50".
Linking up today with Kathy for Slow Sunday Stitching.

Saturday, August 30, 2014

Signature Quilt

Signature

This signature quilt was a last year common project of our quilting bee group. Each person did two blocks and then we organized a lottery. Michele was the happy winner! Once the blocks sewn together, We embroider our names on our blocks.

Quilt and bird

Signature quilt

Signature quilt

Quilt and two baskets

Siganture

Signatures

Signature block

Hum... it should have been finished last year! However, I think this is a lovely souvenir for Michele,
our beloved friend!

Cheers!
Christine