The following pattern is given for a finished 8.00" x 8.00" block
You will need fabrics of three different volumes of colors :
One dark for the small size squares
One light for the small size squares
One medium for the large and medium size squares
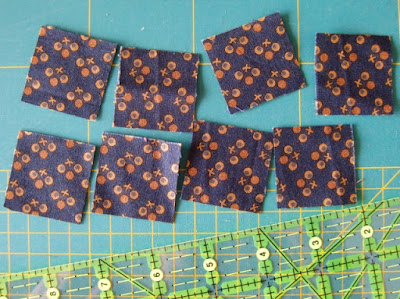
With your medium volume fabric cut a rectangle of 9"x4.50"
Then cut it in two.
Still with your medium volume fabric, cut a rectangle of 10"x2.5"
Then cut it in 4 squares of 2.5"x2.5" each.
With your dark volume fabric, cut a rectangle of 12"x1.5"
then cut it in 8 squares of 1.5"x1.5" each.
With your light volume fabric, cut a rectangle of 12"x1.5"
then cut it in 8 squares of 1.5"x1.5" each.
Place your squares this way.
Sew the small dark and light squares together, right side against right side.
Press the seams towards the dark squares.
Go on assembling to obtain a 4 Patch block.
Press the seams open.
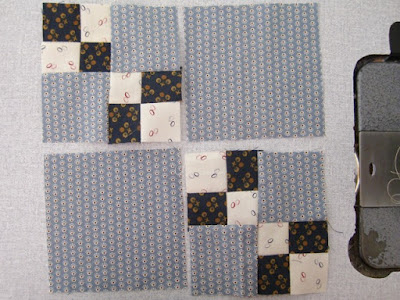
Sew your 4 patch blocks with the medium size squares.
Sew together as seen above, to obtain a double 4 patch block.
Add to your double 4 Patch block your large size square.
Sew right side against right side.
Assemble the 2 half blocks right side against right side.
Press and trim seams to get a perfect 8.50"x8.50" block.


Thanks for the tutorial...this one is on the TO DO LIST!! Your's is going to be gorgeous!
ReplyDeleteLovely tutorial--I really like this pattern--the darkest little squares really lend an amazing movement to it....hugs, Julierose
ReplyDeleteMerci pour ce tuto simple et efficace !! Yapluka à présent !! :)
ReplyDeleteI like this very much! Will add it to my list.
ReplyDeleteAjouté dans mes signets!
ReplyDeleteMerci beaucoup, c'est très précis comme explication!
Best wishes!
This quilt is on my bucket list, so these instructions are very helpful. Thanks for sharing!
ReplyDeleteMerci tout plein Christine pour le tutoriel . C'est très gentil .
ReplyDeleteJe vous en prie Martine. Je ne peux vous répondre personnellement car vous etes "no-reply".
DeleteA lovely quilt I'd love to make one day :)
ReplyDeleteExcellent tutorial! I have a book with this pattern in it that I have wanted to make since purchasing the book a couple years ago...my how my quilting world gets turned this way and that way! LOL. Your tutorial gives me that , oh yeah I must make this quilt, incentive. Thank you for sharing and have a wonderful creative day!
ReplyDeleteVery well done! You take the best photos. This is one of my all time favorite blocks, so many options and goes together so well. Thanks for taking the time to write it out.
ReplyDeleteMerci pour le tuto! Le quilt est vraiment très beau. Un jour, peut-être!...
ReplyDeleteGreat tutorial. The pictures tell the story. Your fabrics and little blocks, all put together, are perfect.
ReplyDeleteSuch a great pattern! Great tutorial!
ReplyDeleteWhat a lovely pattern, dear Christine, so nice of you to do a tutorial.
ReplyDeleteAmalia
xo
What a gorgeous quilt! Thanks for the tutorial!
ReplyDeleteYour pattern is so effective, thanks for the great tutorial!
ReplyDeleteQuel travail! Et quel magnifique quilt ! The best !!!!!!
ReplyDeleteIt looks great! And so impressive when put together in the quilt!
ReplyDeleteVery pretty quilt, thanks for the tutorial.
ReplyDeletejust wow
ReplyDeleteLove this quilt-- I was looking over your tutorial - and wondered why one of the 4 patch blocks is turned the opposite way-- is this the way it should be or should they all be going in the same direction? I really want to make this quilt love your photos
ReplyDeletethanks sue
Thanks for your visit on my blog Susan! How funny, I wonder why I did this mistake and how come I did not see it and nobody told me! Even now, it took me some time to find the mistake!!! Good luck for your quilt!
ReplyDeletethank you for the tutorial. Somehow, the finished blok looks very complex, but the explanations make it simple!
ReplyDeleteYou are welcome Marie Louis, thanks for your visit and comment!
DeleteFound you on Favequilts.com. Your quilt looks like fun to make. Thank You.
ReplyDeleteI never do squares that small....but for this i would! Love it! Thanks!
ReplyDelete